How To Fix Mini Bike Brakes?
I’ve learned how to keep my bike’s brakes in tip-top shape through trial and error. There’s nothing worse than sudden brake failure when flying down a hill or racing around corners. With some mechanical know-how though, you can get those essential stoppers working smoothly again.
Whether drum brakes in the rear or hand brakes up front, the system needs periodic fixing. From experience, I know those periodic squeals and grinding sounds mean it’s adjustment time. I’ll cover the key repair steps I use to maintain safe braking performance.
Inspect the Brake Pads
- Remove the wheel for full pad visibility
- Check pad thickness exceeds 1/4 inch. Less means replace.
- Inspect for oil contaminating the pads. Sand away light oil to restore grip.
- Listen for squeals or grinding. That indicates poor pad contact.
Time to Replace Pads
- Excessive wear below 1/4 inch
- Oil contamination reducing braking
- High-pitched noises from uneven contact
Replace Worn Pads
- Buy pads made for your model
- Retract shoes fully to allow clearance
- Pry out the old pad and insert the new one
- Apply brake grease on shoe contact points
- Check pad wear often. Avoid oil.

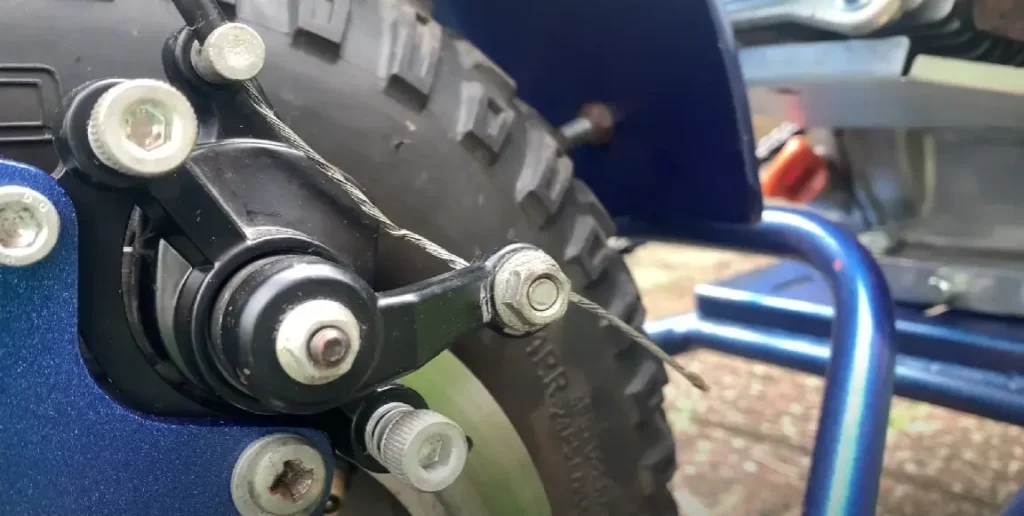
Adjust the Brake Cable
Symptoms of loose brake cables include having to pull the brake lever all the way to the handlebar before the brakes engage.
To remove slack:
- Loosen the caliper bolt securing the cable.
- Firmly pull the cable through while re-tightening the bolt to hold it.
- Don’t over tighten, which can fray the cable.
Use the barrel adjuster on the lever to fine tune tension:
- Turning clockwise increases tension
- Counter-clockwise decreases tension
- Adjust in small increments to prevent over-tightening
- Allow 2-4 mm of lever free play so the brakes don’t drag
Proper tension equals full braking power on initial lever pull. Replace frayed or damaged cables. Lubricating cables reduces wear.
Lubricate Brake Parts
Smooth brake lever and caliper pivot operation is key for proper braking. Binding or stickiness prevents full engagement.
Use lightweight oil or spray lube made for brakes. Regular motor oil contaminates pads.
Lubricate:
- Where the brake cable inserts into the lever
- The caliper bolts where they pivot
- The brake arm bushing and rod ends
Only apply a small amount of lube on friction points. Over-oiling attracts contaminants. Avoid getting lube on pads or rotors. Use a rag to protect them.
Lubricate pivots before reassembling hardware to prevent binding.
Replace Weak or Broken Return Springs
The return springs retract the brake shoes from the brake drum surface when released. This allows the wheel to spin freely.
Weak or broken springs let the shoes drag on the drum. That causes poor braking and potential damage.
To replace springs:
- Remove the drum to access shoes and springs.
- Note spring positions and attachments.
- Carefully remove clips or fasteners to detach springs.
- Install new springs in the same spots, pulling back the shoes to attach.
- Confirm shoes fully retract when released.
Use spring pliers and eye protection when working with tensioned springs. Always replace springs in pairs on each side.
Straighten Bent Brake Drums
Warped or misaligned brake drums make it tough for pads to fully contact. This reduces braking power.
Issues from bent drums include:
- Brake pulsing from uneven contact
- Overheating from dragging pads
- Abnormal wear on one side
To straighten a bent drum:
- Remove from the wheel and inspect closely. Mark any high spots.
- Use a rubber mallet and wood block to gently tap the marked spots.
- Rotate and check roundness. Multiple light taps work better than hard hits.
- Finish by rubbing with emery cloth for an even surface.
Severely damaged drums may need replacement. But careful straightening can often restore function. Adjusting shoes helps compensate for minor drum irregularities.
Align the Brake Shoes
The shoes need proper alignment for even drum contact and braking.
Incorrect alignment can cause:
- Uneven braking and grabbing
- Localized overheating and glazing
- Rapid wear on one side
To align the shoes:
- Loosen mounting bolts and rotate each shoe so the surface lines up evenly with the drum.
- The leading and trailing edges should have equal clearance to the drum when retracted.
- Tighten mounting bolts equally to lock them in position.
Shoes often have a slight toe-in so leading edges contact first. This compensates for drum expansion when hot.
Ensure the wheel spins freely when brakes are released. Further adjustment is needed if shoes drag.
Replace Worn or Damaged Cables
Signs that brake cables need replacement according to Adam Smith, a brake technician:
- “The cables should be replaced if they are frayed, kinked or corroded, as this can reduce braking power,” Adam Smith advises, a Mini bike expert and technician from Street Rider of Reno Reno, NV
- Additional signs include broken strands, rust and lack of smooth operation through the housing.
To replace cables:
- Mark the routing for proper reinstallation.
- Use wrenches to detach the old cable.
- Clean housing ends and apply fresh lube.
- Install new cable ensuring full housing seating.
- Adjust tension and test lever feel.
Use OEM-style cables matched for your model. Galvanized steel offers good corrosion resistance. Stainless steel lasts the longest.
End fittings should snap securely into levers and calipers. Avoid cheap cables with loose fittings.
Conclusion
Proper brake function is critical for safe, reliable riding, emphasizes Adam Smith. By regularly inspecting pads and cables, making adjustments, replacing worn parts, and flushing brake fluid annually as Smith recommends, you can maintain like-new performance. Brake fluid absorbs moisture over time, lowering its boiling point and braking performance.
Key maintenance steps include:
- Checking pad thickness and contamination
- Keeping cables tensioned
- Lubricating pivots to prevent binding
- Replacing weak springs and frayed cables
- Straightening drums and aligning shoes
Investing in routine brake care maintains that essential stopping power. Get out there and enjoy mini bike thrills knowing your brakes are in excellent working order!