
How to Replace Throttle Cable on Mini Bike?
Detach the old cable by loosening fittings at both ends without yanking. Install an identical new cable, lubricating its inner wire. Make tension adjustments to remove slack then test functionality completely before riding.
Recently, my mini bike’s throttle got stuck during a ride. I could barely speed up on trails despite twisting the grip hard. A damaged cable had ruined my day’s plans.
Control and acceleration are very important in mini bikes. Bad cables severely affect performance. Replacing one is quite easy with some mechanical skill and tools.
In this guide, I’ll outline the key steps I followed to replace a throttle cable:
- See signs of issues
- Remove old cable
- Install new high-quality cable
- Make adjustments
- Test controls
By the end, your mini bike’s throttle response will become smooth again after following these. You’ll enjoy rides once more!
Key Takeaways
- Regularly inspect throttle cable for damage or sticking issues
- Detach old cable by loosening fittings, avoid yanking directly
- Install new cable identical to old routing, lubricate inner wire
- Make tension adjustments for responsive feel without slack
- Test throttle functionality thoroughly before riding
Spotting Problems
It is vital to regularly check the throttle cable condition. Look for sticking, loose, inconsistent throttle response, or visible cable damage. These show underlying issues.
The inner cable or housing may degrade over time. Some common signs after prolonged use are:
- Sticking throttle that is slow to return
- Delayed or uncontrolled acceleration
- Fraying or kinks in cable housing
- Exposed inner cable wires
I recommend proactive throttle cable changes every 1-2 years as preventive maintenance. Immediately replace cables showing the above symptoms. Worn cables severely impact safety and performance.
You’ll need some essential tools and parts before starting:
- Replacement throttle cable
- Cable lubrication tool
- Zip ties
- Wrenches for bolts
- Protective gloves
Using the prescribed genuine components for your mini bike model avoids compatibility issues.
Inspect issues thoroughly first. Then, we can move to the next step – safely detaching the faulty cable.
Detaching The Cable
Start the throttle cable replacement by gaining access to the key components:
- Remove cover screws or bolts to reveal cable housings
- Carefully slide out cable sleeves to access the inner wire
- Clearly note original cable routing before detaching
Correct routing is vital for smooth functioning. Use diagrams or take photos if needed.
Next, loosen collar screws or bolts to release the cable ends from:
- Throttle valve on engine
- Throttle controls near handlebar
Avoid yanking cables directly without loosening fittings first. This can damage the throttle valve or adjustment mechanisms.
Take pictures of all connections before disconnecting as well. This eases reassembly later.
With access gained and terminals detached, slide out the damaged cable completely.
Temporarily protect openings using tape or caps to prevent debris entering.
The stripped down state also permits thorough component inspection we’ll cover next.
Installation Tips
Start preparing the new throttle cable by generously lubricating the inner wire using a cable lube tool. This allows smooth sliding movement inside the housing.
Next, carefully route the replacement wire identical to the original one. Refer to routing notes and diagrams made earlier. Ensure no tight bends or kinks by securing with zip ties.
It is vital to replicate the exact connections:
- Reconnect one cable terminal to the throttle valve
- Attach other end to the handlebar throttle grip
Double check that the throttle rotates freely through its complete range without binding before fully tightening fittings.
Make minor tension adjustments at both ends to achieve desired resistance when accelerating and smooth return action.
Test ride and tweak settings until throttle operation feels responsive, with negligible slack. Optimizing cable tension prevents delayed acceleration while also avoiding engine throttle sticking open.
With the basics covered, we are now ready to validate functionality restoration in the final step.
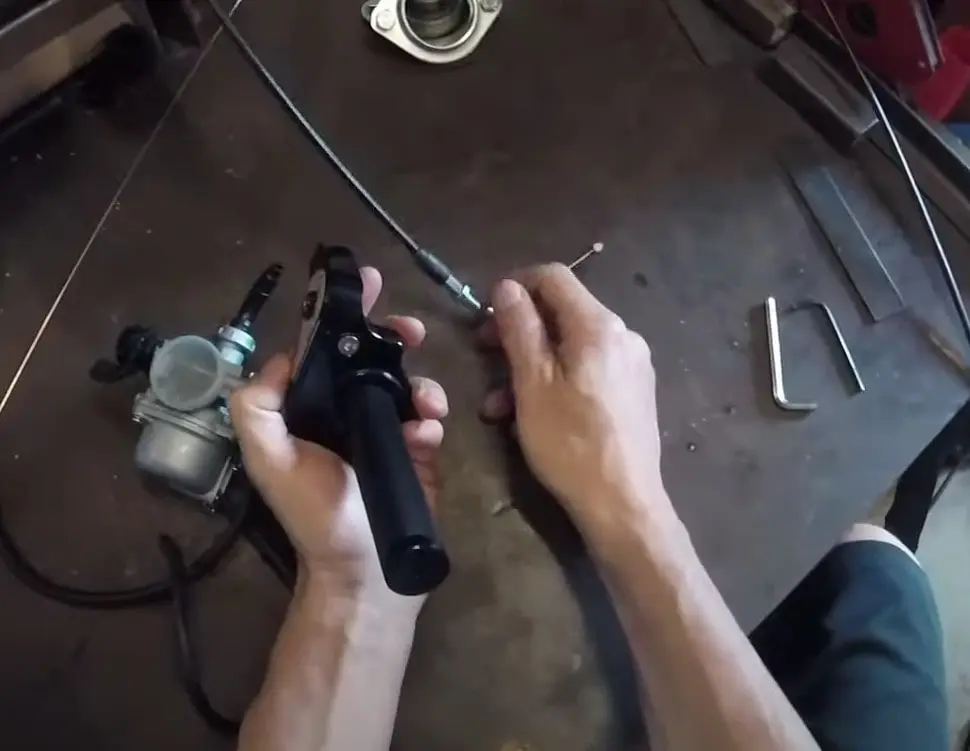
Installing the New Throttle Cable
Use a cable lube tool to lubricate the new cable’s inner wire well. This lets it slide smoothly inside.
Route the replacement cable just like the old one. Refer to the routing diagrams prepared earlier. Zip tie it but don’t bend it too tight.
Reconnect the exact same ends:
- Attach one end to the throttle valve/carburetor
- Connect the other end to the twist grip throttle handle
Before fully tightening, check the throttle rotates all the way freely without sticking.
Make small tension adjustments to get the desired feel when accelerating and good return spring action.
Test ride and refine the settings until the throttle operates responsively without slack. Proper tension prevents delayed acceleration and sticking.
Check all fittings are tight. The new cable is now ready for complete functionality testing.
Validating Functionality
Complete the throttle cable replacement by thoroughly testing operation:
- Check throttle grip free play is within prescribed range
- Confirm spring returns it completely when released
- Verify smooth acceleration from idle to max RPM
- Listen for flutter at mid-range throttle
- Check for hesitation or surging during throttle input
Start testing with the engine off to inspect free play and return action.
Then, validate engine response in a safe open area starting from idle RPM. Slowly open the throttle to ensure it transitions smoothly to full speed.
If issues like surging or hesitation occur, further cable tension fine-tuning may be needed.
Minor adjustments at housing barrels and terminals help achieve responsive acceleration across RPM range without slack.
The new cable, when optimized, will offer precise throttle control that greatly enhances the mini bike riding experience once again.
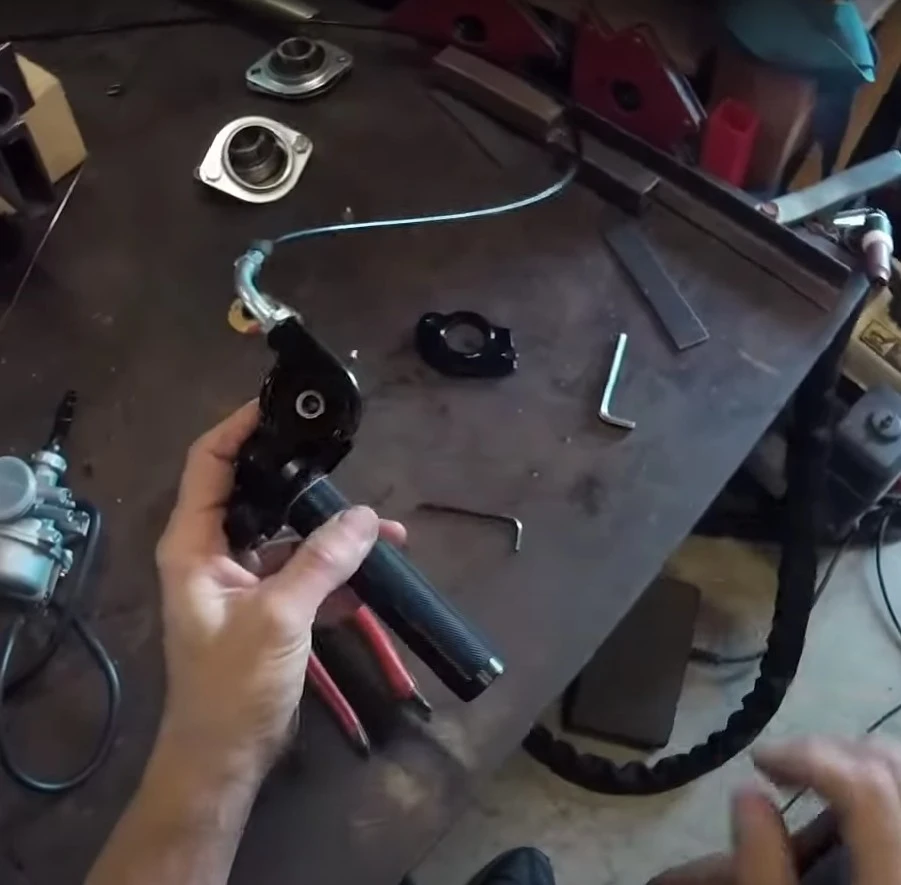
Reassembling Everything
With a working throttle, it’s time to put the mini bike back together:
- Connect the cable housing sleeves and install housing covers
- Use zip ties to secure the cable but don’t bend it too tight
- Put back the gas tank, seat, and other parts removed before
When securing the throttle cable, make sure it has some slack. Adding zip ties to bundle loose cables can help keep things organized.
Routing the cable properly avoids tight bends. This ensures smooth sliding motion inside the housing.
Double check all covers and connections are tightened properly. Try moving parts to ensure nothing restricts movement.
Finally, refill and replace the gas tank. Install the seat securely. Perform one more throttle check before starting your test ride.
With that, you can kick start the engine and enjoy riding your mini bike again! The fresh throttle cable will provide precise control and put the fun back into your rides.
Conclusion
Replacing a bad throttle cable can make your mini bike’s throttle work smoothly again.
Follow the steps in this guide to spot issues, remove the old cable, install and tune the new cable, and test it.
Correct routing, lubrication, and tension of the cable gives great throttle response and control.
Some tips for maintenance:
- Lube cables regularly with a cable tool
- Check cable tension and damage every few rides
- Replace cables on schedule as per manufacturer
Catching problems early prevents breakdowns during rides. Using good quality cables and regular maintenance means your throttle will precisely match your input.
Ride worry-free knowing your throttle cable works great after this fix. Enjoy the extra safety and engine control.