How to Reupholster a Mini Bike Seat?
Worn, cracked seats hurt your ride. Reupholstering boosts comfort and style. This guide shares how to reupholster mini bike seats yourself. Learn to renew seat fabric and foam for less than a replacement.
First, we’ll gather the basic upholstery tools – staple gun, scissors, vinyl fabric, foam, and more. Removing old seat fabric takes patience and care. Then, cut fresh vinyl to size and staple on tightly. Reattach the refreshed seat to finish. Maintain your work with vinyl protectant and regular cleaning.
Reupholstering restores worn seats to improve mini bike function. Step-by-step instructions empower DIYers of all levels. Save money doing it yourself. Gain lasting results and riding enjoyment.
Let’s start the seat revival! Follow these tips to reupholster mini bike seats like a pro.
Key Takeaways
- Reupholstering a mini bike seat is a worthwhile DIY project that restores comfort and aesthetics.
- Gather essential upholstery supplies first – vinyl fabric, foam, staple gun, scissors, pliers, piping, etc.
- Carefully remove old staples, fabric, foam and batting from the seat pan.
- Measure seat dimensions, cut new fabric to size + 3-5 inches extra, and add piping.
- Staple new fabric to seat pan starting at center and working outward in sections.
- Pull fabric very taut and use plenty of staples for a smooth finish.
- Reattach renewed seat to bike frame securely with original or new hardware.
- Inspect work and apply vinyl protectant spray when done.
- Maintain with periodic cleaning, conditioner, and by checking attachments are tight.
- Look for signs of wear and touch up or reapply vinyl protectant as needed.
- Reupholstering builds DIY skills for seats on ATVs, motorcycles, jet skis, etc.
- Renewing your own seat saves money and lets you customize your bike’s style.
Gather Materials and Supplies
Reupholstering a mini bike seat requires some specific equipment and accessories. Gather these materials before getting started:
- Upholstery fabric: The best options include marine vinyl, standard vinyl, or durable woven fabrics. Purchase 2-3 yards to ensure sufficient material. Consider extra yardage if adding piping or trim.
- Foam: High-density foam between 1-2 inches thickness works well. Replace old foam or use it as a template to cut new foam. Opt for weatherproof marine foam.
- Staple gun and staples: A pneumatic stapler allows effortless stapling. Always use upholstery grade staples with the correct size for your fabric thickness.
- Scissors or shears: Sharp scissors make precise cuts in vinyl and fabric. Shears quickly cut long straight sections.
- Pliers and screwdrivers: Normal pliers or upholstery pliers help grip and remove staples. A Phillips or flat head screwdriver can also pry out old staples.
- Safety gear: Protect yourself with goggles, gloves, a mask, and work apron.
- Piping: Decorative piping hides staples while adding a pro touch. Match or contrast colors.
- Thread, adhesive, rivets: Invisible thread blends piping seams. Spray adhesive tacks fabric temporarily. Pop rivets attach trim.
Gathering these materials ahead of time ensures you have all the right tools for a smooth reupholstery process. Focus the project by assembling the key equipment.
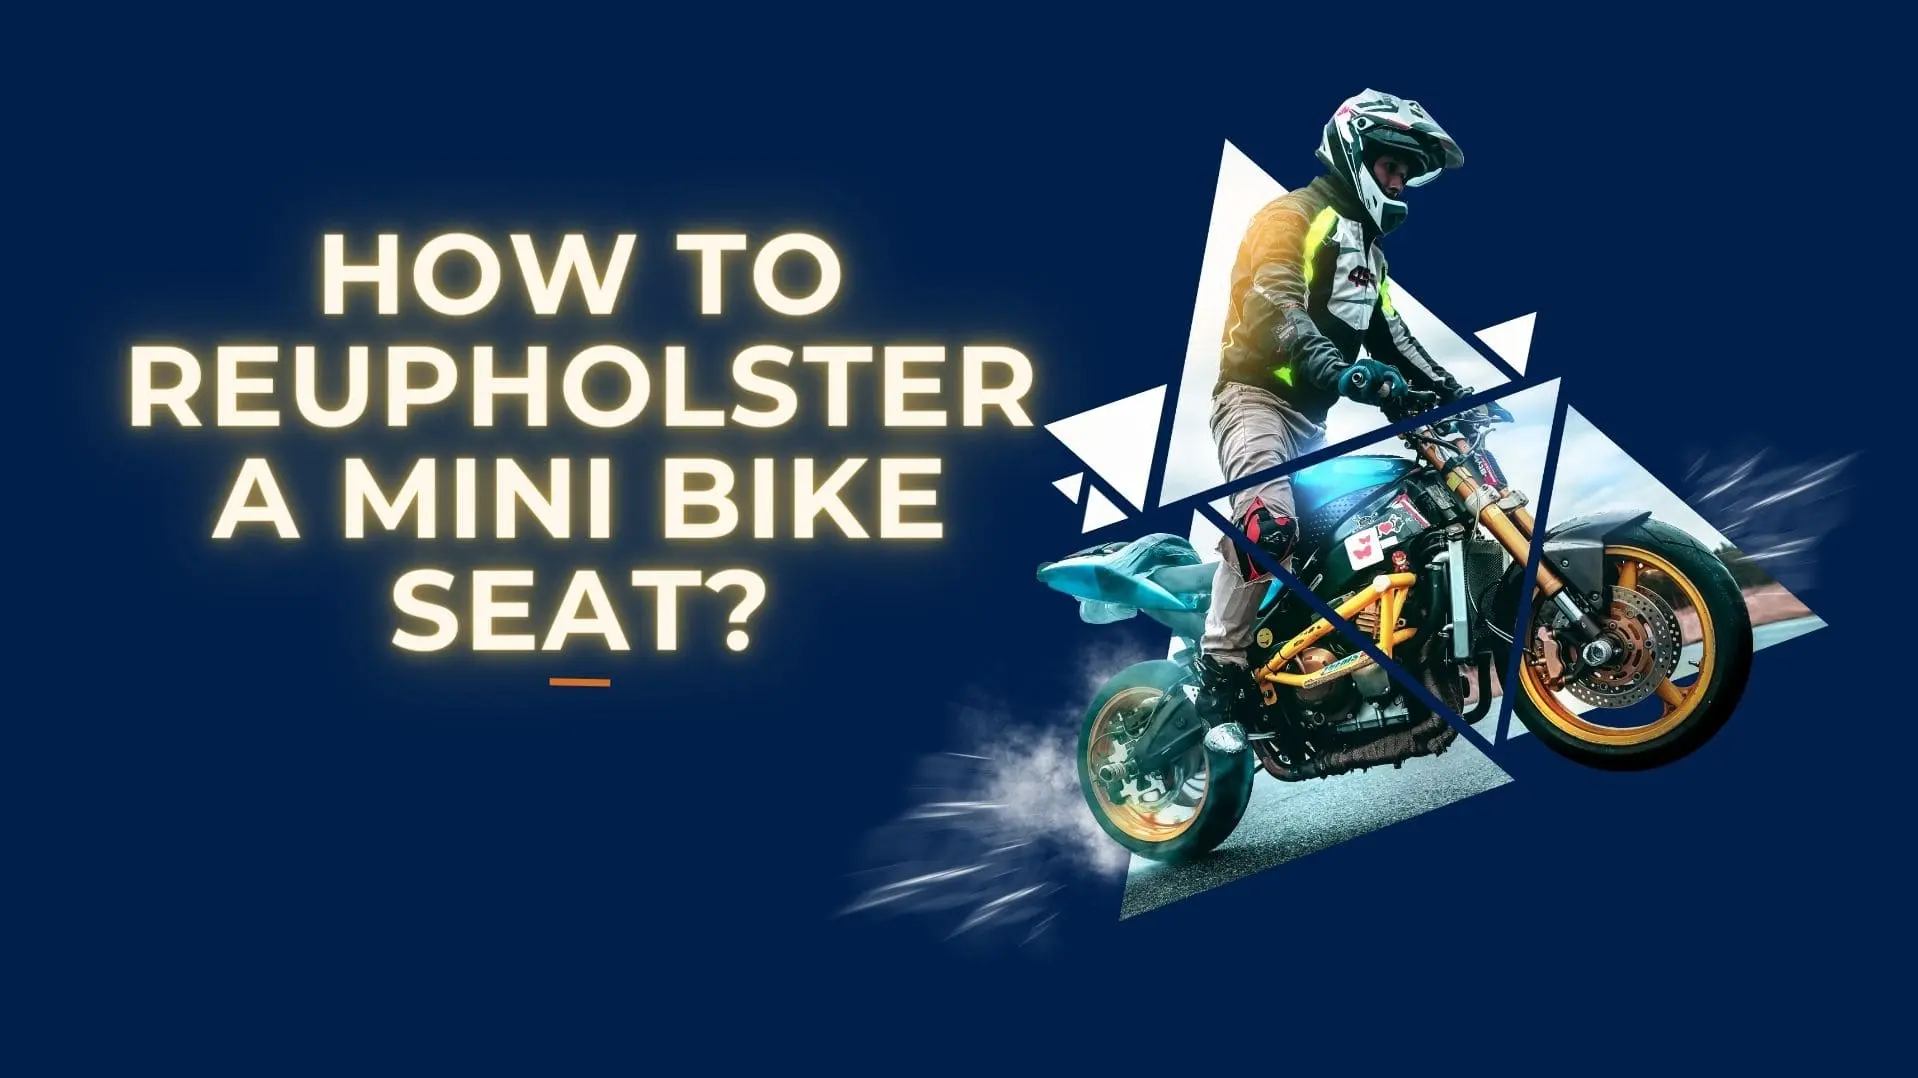
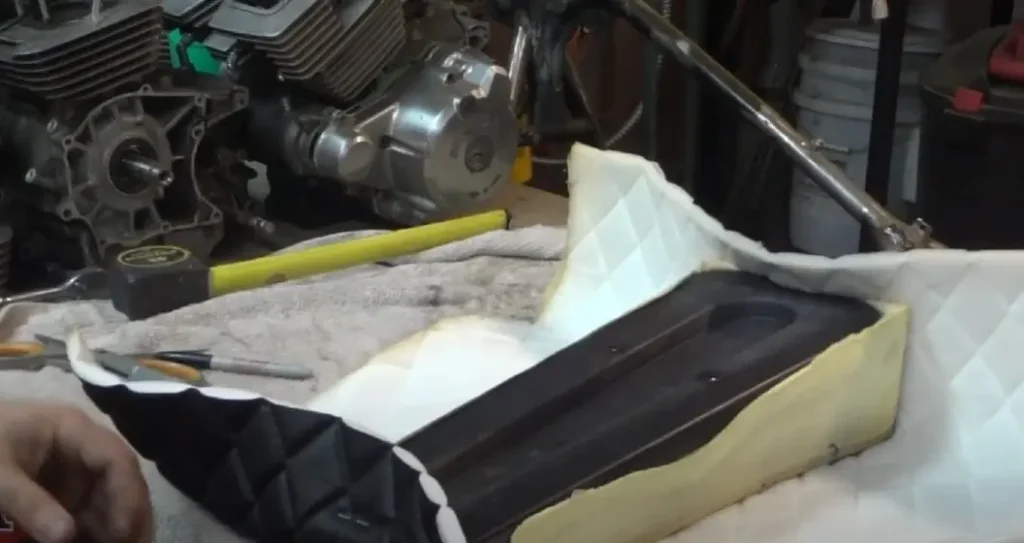
Remove the Old Upholstery with Care
When reviving a worn seat, start by removing the existing upholstery. This important step takes some finesse.
- First and foremost, you must detach the seat properly from the bike frame using the correct tools for your make and model. Be cautious of pinch points and hardware coming loose.
- Then meticulously take out the old staples and fabric. I recommend using an upholstery staple remover tool for clean results versus trying to pry them out with a flathead screwdriver alone.
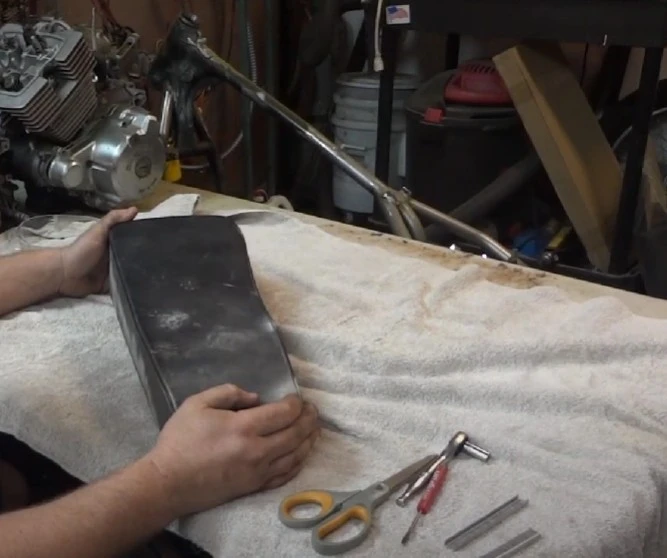
- As you work, carefully inspect the foam and batting for deterioration or compression issues. Replace if the cushion is compacted, ripped or has lost resilience. Opt for fresh high-density foam to ensure optimal comfort and support for many seasons of use.
- If keeping the original foam, use it as a template to trace and cut replacement cushioning. Plan to replace the batting as well for fresh padding.
By starting with a blank slate and removing all old upholstery, you can reupholster the mini bike seat properly. This mindful process is essential for achieving a flawless outcome. Be patient and remove the existing staples, fabric, foam and batting completely before moving to the next steps.
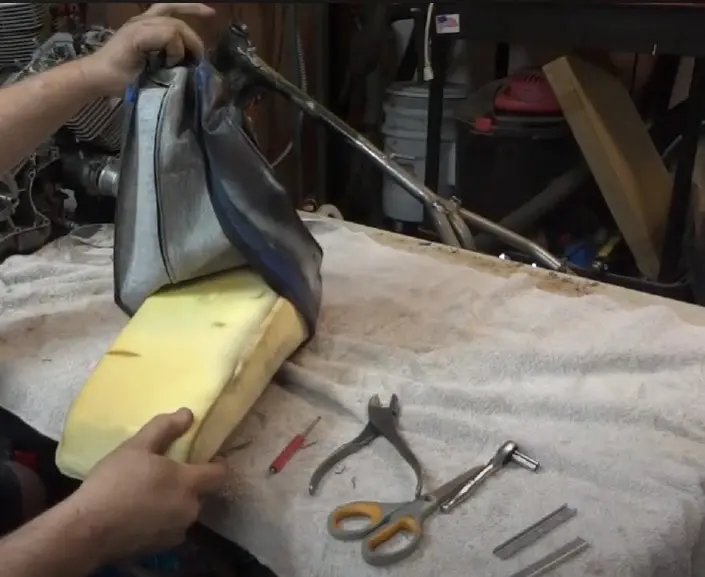
Cut the New Fabric
- Carefully measure the seat pan before cutting fabric. This gives the right fit.
- Use a tape measure to find the length and width of the seat pan. Add 3 to 5 extra inches on all sides. This gives room to pull fabric tight.
- Sharp scissors or shears cut upholstery fabric cleanly. Cut along the measured lines. Check that the fabric lays flat in the pan with extra edges.
- Piping makes a nice edge. Piping hides staples too. Pick piping in a matching or fun new color. Measure and cut piping strips the same size as fabric edges.
- Cutting the fresh fabric a bit big allows a snug fit. Quality cuts keep the fabric from unraveling. Add piping if you want a colorful racing stripe border. New fabric cut to size readies the seat for upholstering.
Staple the Fabric to the Seat
- Stapling the fresh fabric to the seat pan takes patience. Work slowly and carefully for the best outcome.
- First, lay the cut fabric over the foam. Staple the center of the fabric to the middle of the seat pan. This keeps it from moving around.
- Next, start pulling the fabric edges tight. Staple the fabric to the pan working outwards from the middle. Go slowly all the way around the seat.
- Staple in sections – do the front first, then sides, and finally the back. The air stapler makes this easier with less hand force needed.
- Use plenty of staples to keep the fabric very tight and smooth. No puckers or ripples should show.
- Finally, use sharp scissors to trim off any hanging excess fabric. Check all edges are secure.
- Taking it section by section results in a smooth, wrinkle-free upholstery job. Work carefully and methodically when stapling the new fabric onto the restored seat pan.
Reattach the Seat and Finish Up

You’re in the home stretch once the fabric is smoothly stapled to the seat pan. Now it’s time to reattach and finish up.
- First, secure the reupholstered seat back onto the bike frame properly. Use the original hardware or new hardware. Tighten bolts to the correct torque spec.
- Double check that the seat is centered and stable on the bike. It should not shift or twist.
- Next, closely inspect your upholstery work. Make sure the fabric is tightly stretched across all surfaces. Look for any loose staples that need another hit.
- Finish by spraying a protectant or sealant on vinyl or fabric seats. This protects from UV damage and conditions the materials. Apply several light coats and let dry.
- Stand back and admire your handiwork! The freshly reupholstered seat gives your mini bike a makeover. Enjoy the renewed comfort on your next ride.
Caring for the Reupholstered Seat
Proper care keeps your restored seat looking fresh. Follow these tips:
- Periodically clean the seat with a vinyl/leather cleaner and conditioner. This prevents dirt buildup.
- Use a soft brush and mild soap and water to scrub off dirt or mud. Avoid harsh chemical cleaners.
- Check that seat attachments are secure before each ride. Tighten any loose bolts promptly.
- Inspect for wear spots on vinyl or fabric. Use touch up kits to fix minor damage.
- Watch for cracks or tears in the material and reapply vinyl protectant frequently.
- Ensure piping remains stitched tightly and doesn’t unraveled. Restitch if needed.
- Consider using a seat cover when storing the bike for long periods.
- Repair larger issues immediately to prevent further unraveling.
With consistent care and maintenance, a reupholstered mini bike seat will last for many enjoyable seasons on the trails! Let the restoration begin.
Renewed Seat, Renewed Ride
Reupholstering your mini bike seat restores comfort and style using basic DIY skills. This guide covered the key steps:
- Removing tattered upholstery with care
- Measuring and cutting fresh, durable fabric
- Stapling new fabric tightly in sections
- Reattaching the seat properly to the bike
- Maintaining your work with vinyl protectant
Reupholstering saves money over replacement seats. It allows customizing your bike’s look and feel. And it builds confidence for more advanced DIY projects.
Consider applying your new skills to other vehicles. With practice, you could reupholster ATV, motorcycle, tractor or boat seats. Start small and work up to larger upholstery projects like car interiors.
In closing, renewing your own seat enables you to revive, refresh and personalize your beloved mini bike. May your handiwork provide an even more enjoyable and comfortable ride for miles ahead.