
How to Tighten Chain on Mini Bike?
Loosen the rear axle nuts, then turn the tensioners evenly in 1⁄4 turn increments to tighten the chain. Re-tighten the axle nuts and recheck tension frequently.
Riding with poor chain tension decreases mini bike performance. A loose chain can slip and rub. This wastes power. An overtightened chain strains the drivetrain. Learning how to check and adjust chain tension is important.
This article shows you how to properly tighten your mini bike chain. We explain how to spot issues. Steps are provided to make adjustments. Tips help troubleshoot problems.
Following these tips helps your mini bike run efficiently. Proper chain tension means maximum power transfer to the wheel. It prevents early wear too. With basic tools and this guide, you can keep your mini bike chain tuned right.
Key Takeaways
- Properly tensioned chains transfer maximum power to the rear wheel for top mini bike performance
- Check for visual slack, noises, and use ruler to measure 0.25 in. slack when checking tension
- Loose chains slip and waste power; overtightened strains drivetrain
- Loosen rear axle nuts, turn tensioners evenly, adjust in 1⁄4 turns, recheck frequently
- Clean and lube chain often; dirt/grime wears chains out faster
- Replace stretched chains showing too much slack after adjustments
- Bent sprockets and overtightened chains also cause issues
- Getting professional help is wise if problems persist after troubleshooting
- Proper chain maintenance = smooth acceleration, high speeds, extended mini bike lifespan
Prep Work
Before adjusting the chain, prep work is needed. This involves:
- Gathering tools
- Wrenches for loosening bolts
- Chain lubricant and brushes
- Ruler or micrometer for measuring
Having proper safety gear is also essential.
- Wear protective gloves and eyewear. Chains can whip around dangerously when loose.
Finally, stabilize the mini bike properly:
- Use a bike stand to lift both wheels off the ground. This allows the chain to move freely for adjustments.
- If lacking a stand, carefully tilt or elevate the bike’s wheels. Ensure the bike remains stable and won’t tip over.
With the right tools, safety gear, and a stabilized bike, you’re ready to adjust the chain tension safely. Moving forward methodically prevents injury and damage.
Checking Chain Tension
Once the prep work is complete, it’s time to check the chain tension. Here’s how:
- Look closely for any signs the chain is loose. Watch for sagging or visual slack. Also check for chain slipping when rotating the wheel. Some side-to-side sway is normal, but excessive looseness impairs performance.
- Listen closely as you rotate the rear wheel. Any loud grinding or squeaking noises could indicate an issue with tension. Chains should run quietly when properly adjusted.
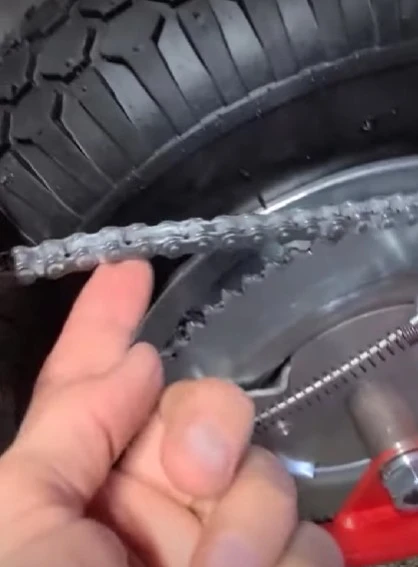
- Use a ruler to measure slack in the middle of the chain. Simply lift the chain up and measure the gap to the bottom of the straight part of the chain. There should be about 0.25 inches of slack in the middle when properly tensioned.
If you spot excessive looseness upon visual inspection, hear abnormal noises, or measure more than 0.25 inches of slack, the chain tension likely needs to be adjusted.
Catching issues early and making minor adjustments can prevent more significant problems down the road.
Proper Chain Maintenance
Properly maintaining the chain is essential for optimal mini bike performance and life. Follow these chain maintenance tips:
- Clean and lubricate the chain regularly. Buildup of dirt and grime accelerates wear. Use a chain brush with degreaser to clean the links. Then apply a quality chain lube to prevent rust and reduce friction.
- Follow the maintenance schedule in your mini bike’s owner’s manual. The manual provides model-specific guidance on how often to clean, lubricate, and replace chains. This helps prevent premature wear.
- Watch for signs of an excessively stretched or worn chain. If sagging persists after adjustments, links are stiff, or you count more than a few tight spots through the rear sprocket rotation, the chain may need replacement.
Proactive chain maintenance ensures you get the maximum life and performance from your mini bike.
Keeping the chain clean, lubricated, and monitored for wear reduces friction and prevents inefficient power transfer.
Adjusting the Tension
Properly adjusting chain tension is crucial for optimal mini bike performance. Follow these steps:
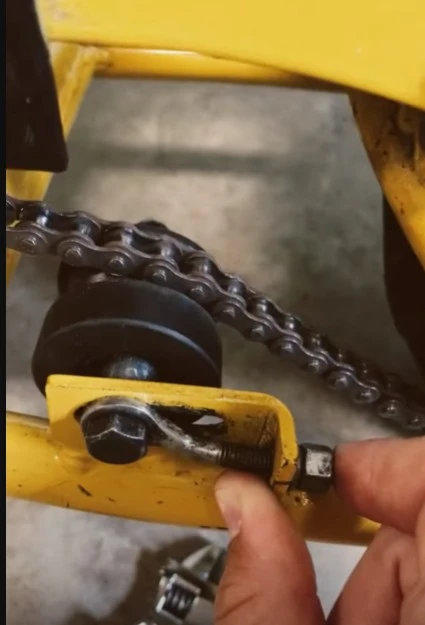
- Loosen the rear axle nuts using the appropriate sized wrench. Only loosen the nuts enough to allow the wheel to move for adjustments.
- Turn the tensioners on each side evenly to tighten the chain. I recommend adjustments in 1/4 turn increments, checking tension in between.
- Once desired tension is reached, re-tighten the axle nuts to lock the wheel in place. Use a wrench to hold the axle steady while tightening the nuts.
- Spin the wheel and check that the chain runs centered on the front and rear sprockets. Misalignment can cause rapid wear.
- Use a micrometer to confirm the distance between the sprockets is equal on both sides. The chain should run straight with no deviation.
Following this methodical process ensures proper chain tensioning for peak mini bike performance.
Take your time and make adjustments incrementally until everything is perfectly aligned.
Troubleshooting Tips:
Even with proper adjustment, chain issues can still pop up. Here are some troubleshooting tips:
- If your chain becomes overtightened, loosen it incrementally to find the optimal tension. Chains overtightened by just half a turn can result in rapid component wear.
- For a chain that persists in slipping off the sprockets, first clean and lubricate it thoroughly. Then inspect the sprockets for any worn or bent teeth that may catch the chain.
- In some cases, persistent slippage indicates a stretched chain in need of replacement. Use a chain wear tool to measure the elongation if tension adjustments do not work.
- Seek help from a professional mechanic if you experience issues getting the wheel realigned, keeping the chain on the sprockets, or determining if replacement parts are needed. They have the expertise and tools to diagnose and fix more complex issues.
A bit of troubleshooting and maintenance can often resolve common chain problems without the need for shop repairs.
But it’s important to recognize when professional help is required – don’t force parts to the point of damage.
Conclusion
Having properly tensioned and maintained chains are vital for getting peak performance and longevity out of your mini bike. Follow the recommendations in this guide to reap the benefits:
- Proper chain tension means efficient and smooth power transfer to the rear wheel. This allows your mini bike to reach its full acceleration and top speed potential.
- Consistent cleaning, lubrication, and replacing worn chains prevents rapid deterioration. This saves you money by avoiding premature replacement of damaged sprockets or other drivetrain components.
- Adjusting your chain only with proper tools and protective gear, while following the steps outlined here, keeps you safe from whipping chains and debris. Take your time and make incremental adjustments.
By learning to keep your mini bike chain in top shape, you can optimize its riding performance and extend its lifespan. With proper care, your chain will deliver miles of top speed fun.