How to Determine Mini Bike Chain Size?
Check the existing chain for any stamped size markings, like #35 or #420. If no markings, use a ruler to physically measure the chain pitch, roller width, pin diameter, and other dimensions. Then compare your measurements to a manufacturer’s chain size chart to identify the proper replacement chain.
Is Your Mini Bike Chain Damaged?
Are some chain links stuck? Does the chain slip when shifting gears? Does it make grinding noises? If so, your chain may need replacing.
Before buying a new chain, measure your old one. This helps find the right replacement size.
Here’s what we’ll cover:
- Check chain links for size numbers stamped on them
- Use a ruler to measure chain pitch, roller width, etc.
- Match measurements to a chain size chart
- Get new chain with same pitch and roller size
- Also replace sprockets to make chain last
- Order extra links to adjust tightness
- Set slack between sprockets
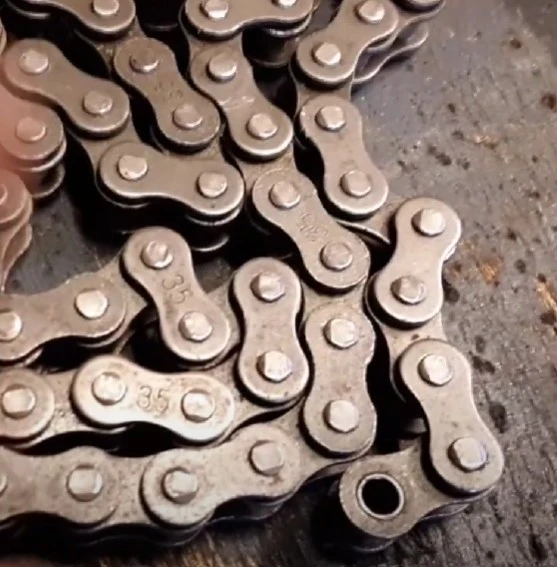
Check the Chain for Size Markings
First, look closely at each chain link. You may see stamped numbers like #35, #40, #41, or #420.
These numbers tell you the chain’s size. #35 chains have a distance of 3/8 inches between pin centers. #40, #41, and #420 chains have 1/2 inches between pins.
This distance is called the “chain pitch.” It is very important for getting the right replacement chain.
The chain pitch must match between your old chain and new one. If the pitch does not match, the chain will not fit right on the sprockets. It would slip and wear out faster.
So check every link for any stamped size markings. If you find numbers like #35, #40, #41, or #420, you can use those to match your new chain.
Measure the Chain Yourself
If there are no stamped size markings, you’ll need to measure the chain yourself. Use either a ruler or calipers to take the measurements.
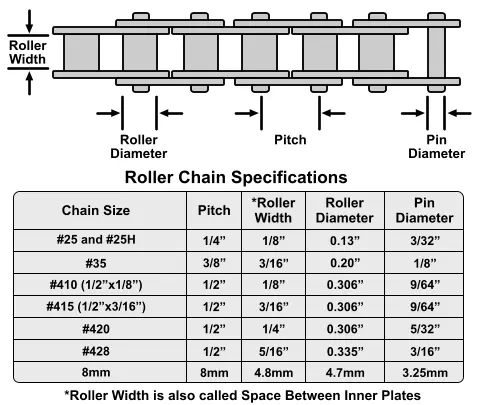
Measure these parts of the chain:
- Chain pitch – The distance between pin centers
- Roller diameter – The thickness of each link
- Roller width – The inner width of each link
- Pin diameter – The thickness of the chain pins
Getting these measurements is easy with a basic ruler or calipers. Write down all the numbers so you can compare to size charts later.
The chain pitch and roller dimensions are most important. Matching these will ensure you get a replacement chain that fits properly.
Measure a few different links just to be sure. Chain stretch over time can cause slight variations. Take averages of your measurements to compare to the size charts.

Compare to a Size Chart
Once you have taken all the key chain measurements, it’s time to compare them to a chain size chart.
Bike chains come in standard sizes, like #35, #40, #41 and #420. Chain manufacturers provide detailed size charts listing the specifications for each chain they sell.
Look at charts from brand names like DID, RK, and Regina. Match your measured chain pitch, roller width, and diameter to the numbers on the chart.
When you find the closest match, you’ve identified your chain’s size.
For example, if your measured chain pitch is 0.5 inches and the roller diameter is 0.33 inches, the #420 chain on the chart is most likely your match.
Double check that your roller width and pin diameter also align with that size.
Matching to the chart ensures you get the right replacement chain for your mini bike’s make and model.
Get Replacement Chain with Same Measurements
Once you’ve identified your chain’s size, it’s important to get a replacement with the same dimensions.
The new chain must have the same chain pitch and roller width/diameter as your old one. This ensures proper fit on the mini bike’s sprockets.
If the pitch or roller size does not precisely match, the chain will not mesh correctly with the sprockets. It would likely slip, jerk, or shred quickly.
Replacing old sprockets with new chains also causes faster wear. So finding a chain with identical sizing prevents these issues.
Double check the product description and size chart before purchasing a replacement. Get the right fit first time and avoid ongoing problems.
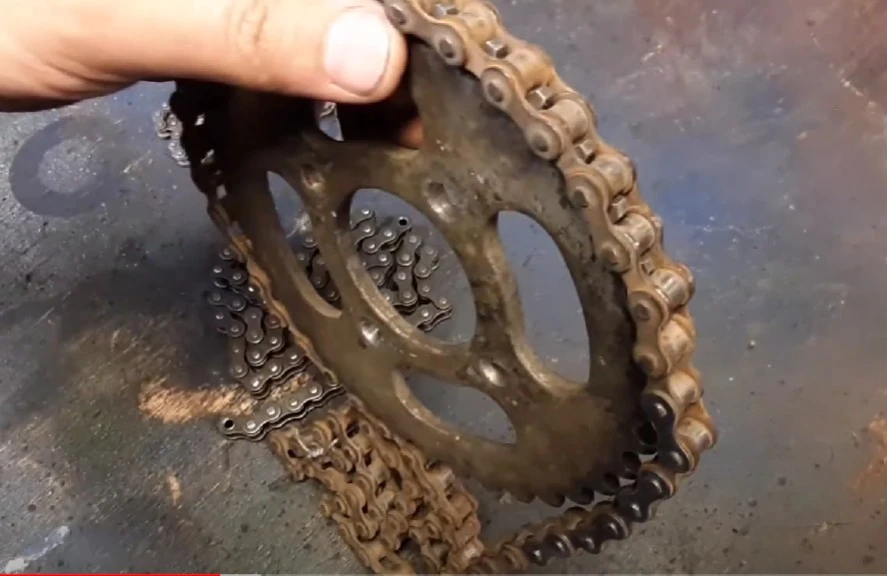
Also Replace the Sprockets
When replacing a stretched or damaged chain, it’s highly recommended to also swap out the sprockets.
The sprockets wear down over time as they mesh with the chain. Putting a brand new chain on old, worn sprockets will lead to premature wear and tear.
The new chain’s rollers will not correctly fit the grooves on worn sprockets. This strains the chain and can damage it.
Replacing sprockets and chains together ensures smooth interaction between the components. The new chain will last significantly longer.
So take the opportunity when replacing your chain to install fresh sprockets too. It saves extra work down the road.
Order Extra Links
When ordering a replacement chain, get a few extra links.
Having spare links allows you to adjust the chain tension later on. Chains stretch naturally as they wear in. This loosens the tension over time.
Adding in or removing links is how you take up that slack. The number of extra links depends on the bike. But 2-4 extras is usually sufficient.
Having these spare links eliminates the need to buy whole new chains just for adjustments. You can tune tension for smooth shifting as needed.
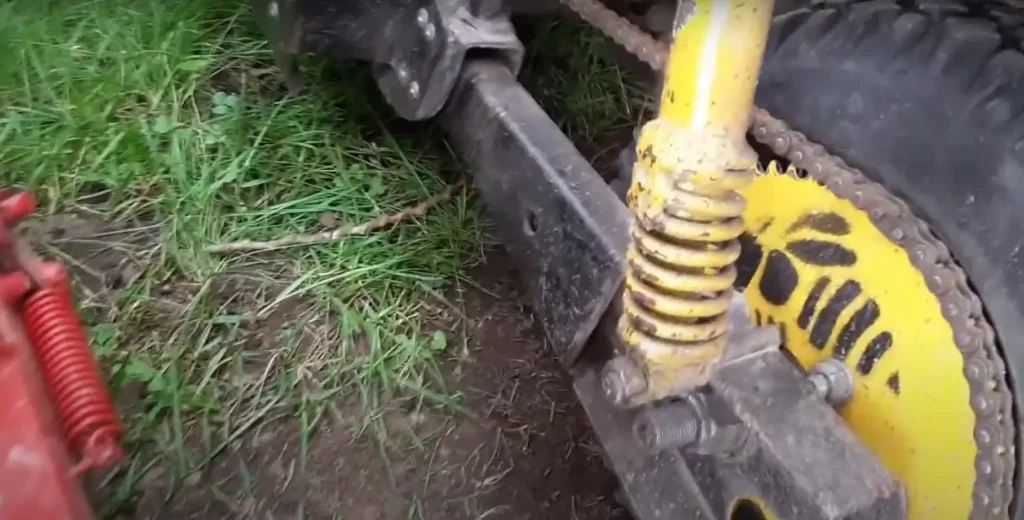
Check Proper Chain Tension
Once installed, check that the chain has the proper amount of tension. There should be a bit of slack, but not too much.
About 3/8 inches of play between the chain and sprockets is ideal. You’ll see this slight sag as it runs through the drivetrain.
No slack can cause binding and inefficient pedaling. Too much slack leads to chain derailment.
Small adjustments to add or remove links tunes the tension perfectly. The chain should move freely with a bit of play along the sprockets.
Proper tension prevents jamming while still allowing crisp shifting. Check and adjust as needed after install.
Finding the Right Mini Bike Chain Size
Determining the correct replacement chain size is important for keeping your mini bike running smoothly. Here are the key steps covered:
- Check the existing chain closely for any stamped sizing markings, like #35 or #420.
- If no stamps, measure the chain pitch, roller width, and other dimensions yourself.
- Compare your measurements to a chain size chart to identify the proper replacement.
- Be sure to get a new chain with the same pitch and roller sizes.
- Consider replacing the sprockets at the same time to prevent fast wear.
- Order a few extra links to help adjust tension later on.
- Set the right tension – around 3/8 inches of slack between sprockets.
Taking these steps will ensure you get the precisely sized chain your mini bike needs. It will mesh smoothly with the sprockets and last for many miles of dependable riding.
Installing a new chain at the first signs of wear also prevents damage to the rest of the drivetrain. Keep your mini bike shifting and performing its best by finding the right chain replacement.