How to Install Key Ignition on Mini Bike?
Carefully wire and mount a compatible ignition switch in an accessible spot. Follow all electrical safety precautions and manufacturer’s specifications for proper installation providing security and easy starting.
Adding a key ignition switch to a mini bike allows you to turn the engine on and off conveniently with a key instead of disconnecting the battery each time. This also prevents unauthorized use, requiring a key to start the bike.
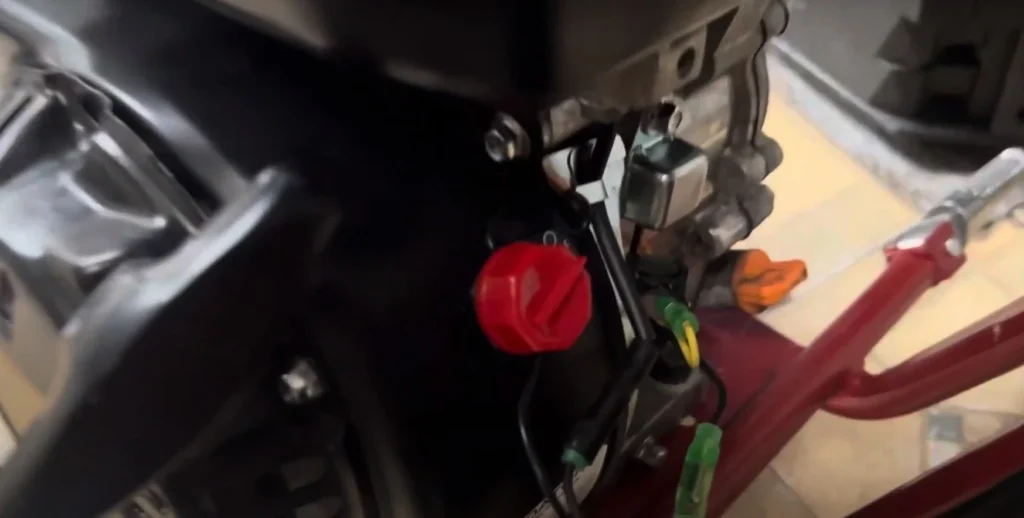
The ignition switch gets wired into the electrical system. When mounted and turned to “on,” it lets current flow to start the engine. Turning it to “off” cuts the power like a kill switch.
Installing a keyed ignition can:
- Improve security – needs a key to operate
- Offer convenience – easy on/off switch to start/stop
- Act as an emergency shut off
- Provide durability for long lasting use
This article covers installing a key ignition switch on a mini bike. It looks at the parts required, wiring details, mounting, and how it works. Safety tips are also provided. Let’s begin.
Key Takeaways
- A key ignition switch brings security and convenience by enabling easy on/off control of a mini bike.
- The switch needs to be wired into the existing electrical system properly, identifying wire functions.
- Mount the switch securely in an accessible spot like the handlebars using included hardware.
- Carefully connect wires and accessorize additional features like lights using relay if needed.
- Insulate and route wires properly away from hot/moving parts and test connections thoroughly.
- Follow all safety precautions like protective gear, disconnecting battery, proper mounting.
- Choose an appropriate ignition switch with required positions, voltage rating, and durability.
- Take the installation step-by-step – don’t skip testing and troubleshooting before regular use.
- With good wiring practices and proper materials, a key ignition provides great function and security.
- Consult bike-specific instructions and an expert if needed for optimal trouble-free installation.
Required Materials
Installing a key ignition switch on your mini bike will require gathering a few parts and tools:
- Key ignition switch – This is the main component, available in 2 or 4 position models depending on your needs. Ensure it has the proper number of contacts for your bike’s electrical system. Waterproof rating is recommended.
- Wiring harness and connectors – Needed to connect the switch to the bike’s wiring properly. Use weatherproof electrical connectors.
- Screwdrivers – Both Phillips and flathead screwdrivers in various sizes to handle mounting screws and electrical connections.
- Pliers – Standard locking pliers are useful for gripping and connecting wires.
- Multimeter – An essential tool for tracing electrical circuits and properly identifying wire functions.
- Wire cutters/strippers – For cutting wires to length and stripping insulation.
- Protective heat shrink tubing – Used to insulate connections from weather and prevent shorts.
- Electrical tape – Can also be used to wrap and insulate wiring connections after soldering.
Having these basic tools and parts on hand will allow you to properly install the key ignition switch with all the right connections. Always ensure you have the necessary materials before beginning any electrical work. Let’s now look at some necessary products list.
Product Recommendations
When choosing a key ignition switch for your mini bike, consider these compatible options:
- QAZAKY Ignition Key Switch – This 2-position switch fits 49cc to 250cc small and mid-sized engines. Compatible with motorcycles, ATVs, go-karts, mopeds, etc.
- Mini Quad Bike Ignition Key Switch – 4-position switch widely compatible with mini bikes, dirt bikes, ATVs, go karts. Durable waterproof construction.
- TC-Motor 2 Wire Ignition Key Switch – Designed for mini dirt bikes, kids ATVs, go karts. Simple 2-wire connection.
- 4 Wire Ignition Key Switch – Snap-in design for dirt bikes and ATVs. Comes with a female connector end.
- 6 Wire Ignition Key Switch – The original style keyed switch for 90cc motors. Includes 6 wires and connector.
- Universal 4-Pin Motorcycle Ignition Switch – Fits many Honda, Yamaha, Kawasaki, Suzuki and KTM motorcycles with 4-pin connectors.
When selecting a switch, ensure it has the proper number of positions and contacts to match your bike’s wiring setup. Check the voltage and current ratings can handle the system load. Waterproof construction and secure mounting are also important features to consider.
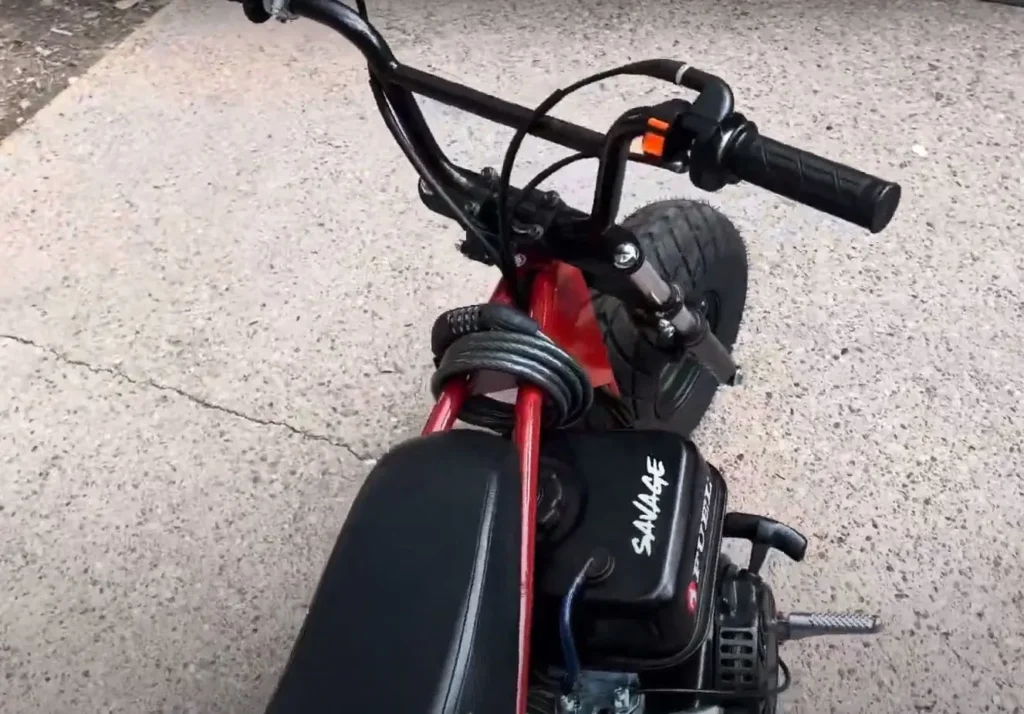
Mounting the Ignition Switch
Choosing where to mount the ignition switch is important. You want it in an accessible spot for convenience when riding. But it also needs to be secure.
- Place it on the handlebars – This puts the switch within easy reach while operating the mini bike. Mount it off to one side so it does not interfere with controls.
- Mount it securely – Use provided mounting tabs or hardware. Make sure it does not wiggle loose from vibration. Proper mounting prevents damage.
- Keep it away from moving parts – Mount the switch away from any parts that move. This prevents the switch from getting hit or pulled on.
- Consider weather protection – Try to mount the switch somewhere sheltered if possible. This protects it from direct rain or mud.
Take the time to mount the ignition switch properly. This provides easy everyday access while keeping it safe from damage. A properly mounted switch will last longer and work more reliably.
Installing and Connecting
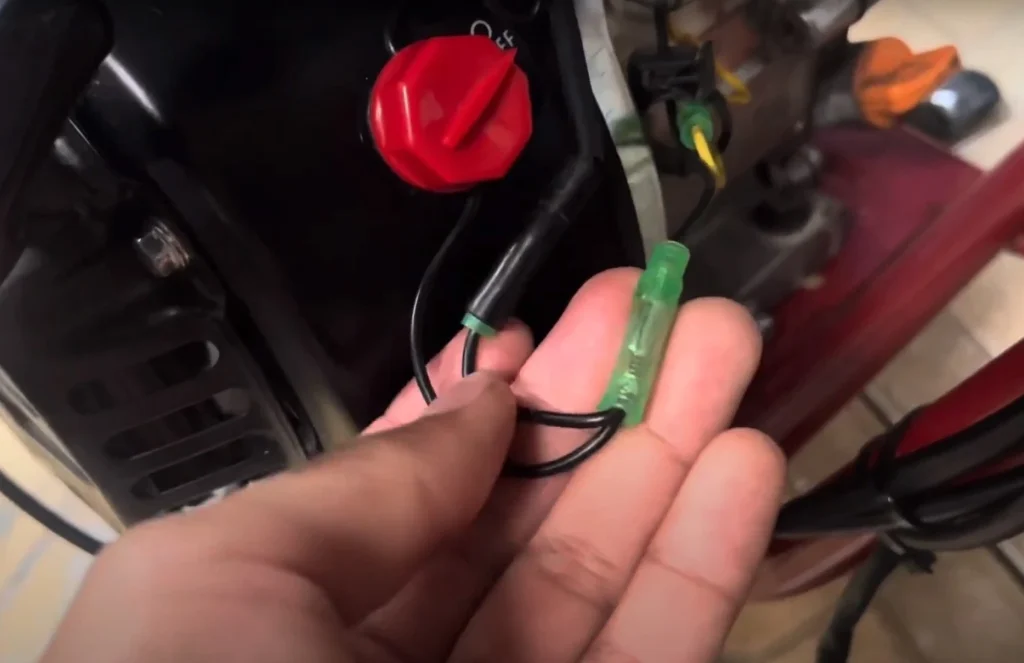
Making clean, secure connections is critical when wiring the ignition switch. As mini bike technician Adam Smith from Street Rider of Reno, with 20 years experience advises explained, “Rushing and not disconnecting the battery are two mistakes I see often. This drains power and can damage parts. Also, misconnecting or pinching wires leads to problems. Take time to disconnect the battery, remove old ignition fully, and connect each cable correctly. Don’t force connections. Double check routing. A careless error can mean redoing the entire installation. Patience pays off with a smooth install.” Based on my experience, here are some additional best practices:
- Insulate connections – Once wired, insulate each connection. I recommend heat shrink tubing secured with a heat gun. Electrical tape also works for insulating and protecting connections.
- Route wiring properly – Make sure to route the wiring cleanly away from any hot or moving engine parts. This prevents damage from heat or abrasion.
- Verify connections – Once wired, use a multimeter to verify all connections before finishing. This ensures proper installation and functionality.
- Check grounds – It’s important to confirm all ground connections are secured. Poor grounding can cause issues.
- Perform visual inspection – Do a final visual inspection to make sure the wiring is properly routed and secured. Check that connections are insulated.
Taking care during installing and connecting is time well spent. As Smith explained, “Installing a key ignition on a mini bike is a project an amateur mechanic can complete in 2-3 hours.” He recommends setting aside a Saturday morning or afternoon to do the job without feeling rushed. Gather all tools and parts ahead of time. Remove gas tank, old ignition, cables first. Attaching new ignition wires neatly takes the most time. With practice, swapping a key ignition can be a 60-90 minute job. This protects the ignition switch wiring and prevents problems down the road. Doing it right the first time avoids headaches later.
Functionality
The key ignition switch serves vital functions. As Smith outlined, “Early mini bikes had simple switch ignitions. More advanced ignitions emerged in the 1970s and 80s. Now, most are transistorized or digital for better performance.”
In short, the switch controls starting and stopping the bike:
- OFF cuts all power like a kill switch, securing the bike.
- ON energizes the system so the engine can run.
- START engages the starter to crank the engine.
The switch acts as the central control point. OFF prevents unauthorized starting. ON allows starting. START conveniently cranks the engine to life.
Understanding this basic switch functionality will allow proper operation. Be sure to verify proper installation by testing each position during and after wiring. Let’s look at some additional features next.
Additional Features

The ignition switch can control other things too.
- Wiring for lights or security – Some switches have extra spots to plug in wires for lights or alarms. You can make them turn on with the switch.
- Use a relay – With lots of extras, use a relay which I always advise. The switch tells the relay when to power the extras. This keeps the switch from overloading.
- Check the ratings – Make sure the switch can handle the power needed for the add-ons. If not, it could fail.
- Use wiring diagrams – Follow the wiring diagrams for your exact bike and add-ons. This gets the wires in the right spots.
Taking it slow and wiring things right lets the switch control more stuff safely. This can add some nice features to your mini bike.
Additional Tips and Troubleshooting
Here are some extra pointers and help with issues:
- Choosing the right switch – Get one made to fit your bike’s voltage and wires. Check the contacts are rated for the electronics. Waterproof rating is good.
- Installing a relay – Use diagrams to see where relays fit. They activate the extras while the switch just flips the relay on. Protect relay wires like the rest.
- Loose connections – Check wires are tight and well insulated. Redo any loose spots. Use diagrams to confirm wires are in the right places.
- Faulty switches – If a new switch fails, it could be defective. Or the wiring could be overloaded. Test the circuits to find the problem.
- No power – Check fuses, grounds, battery charge, and wire connections. Loose wires are a common issue.
- Still struggling – If problems persist, have a professional look everything over. Better to be safe.
Taking it slow and double-checking avoids many problems when installing a key ignition switch. But if issues come up, systematically testing each component will reveal the solution.
Testing and Troubleshooting
Thoroughly testing the installation is crucial before regular use of the bike:
- Check all wiring – Before reconnecting the battery, use a multimeter to verify all wiring connections are correct with good continuity.
- Power up – With the key off, reconnect the battery. Then turn the key on and test for power at accessories like lights.
- Start engine – Attempt starting the engine with the key in both the on and start positions. It should crank and start with the key on.
- Test accessories – With the engine running, test all wired accessories to confirm they operate properly when the key is on.
- No start issues – If the engine does not crank or start, recheck all connections. Test the battery voltage and starter circuit.
- Accessory issues – If accessories are not operating, check their wiring connections and any relays or fuses involved.
- Still struggling – If problems continue, have a professional inspect the installation in case anything was overlooked.
Taking this diligent approach to completely testing all wiring and functions will help identify and resolve any issues at the start. Early problem detection means faster, easier fixes.
Safety Tips
Based on my experience, installing a key ignition switch safely requires these precautions:
- Disconnect the battery – I strongly advise disconnecting the negative terminal before wiring. Accidental contact can cause injury or sparks.
- Wear protective gear – Always wear insulated gloves and eye protection when working on electrical systems. I learned this lesson the hard way early on.
- Check connections – Carefully verifying all connections and mountings prevents issues down the road. Take time to double check.
- Use a multimeter – Knowing your multimeter is vital for properly testing circuits. Learn how to use it if you are unfamiliar.
- Keep the work area clean – A cluttered workspace can lead to accidents. Keep the area around the bike clear.
- Ask for help – If unsure about any aspect, consult a professional. Improper wiring can cause serious issues.
- Follow safety rules – Don’t take shortcuts when it comes to safety. Make it your top priority.
Taking the necessary electrical precautions helps ensure a safe, effective key switch installation. Trust me, it’s worth the minimal extra time and effort.
Conclusion
Putting in the key ignition switch right keeps your bike safe and makes starting easy.
Be sure to follow the instructions for your bike model. Taking it slow and making good connections will help the switch work right for years.
The steps may seem tricky at first. But just take it one at a time – figure out the wires, mount the switch carefully, connect everything neatly, and test it out.
With some basic tools, the right parts, and following the steps properly, you can add a key ignition yourself. Just be safe – wear gloves, disconnect the battery, and double check your work.
Before long you’ll be turning a key instead of unplugging the battery to ride your mini bike!